
I have used iPhoto as long as I can remember. I have also been talking about switching over to Adobe Lightroom for about two years now since installing it. A rumor is surfacing that Apple will be getting rid of iPhoto so I definitely need to transfer my pictures. I tried doing it myself a few weeks ago and epically failed. This summer my sister gave my mom a tutorial and my mom explained it to me a few days later. For those who are either in the same situation with iPhoto or totally fed up with how terrible iPhoto is for photo editing, here is how to transfer your pictures over to Lightroom. Take note: this is for a MacBook Air using IOSX 10.8.5 with Lightroom 5. Take note: you are only copying them, not deleting the files.
Transitioning to Lightroom from iPhoto
Step 1: Find all of the original files. In order to do this successfully, you need to find the correct file. This folder is called “masters”. You can find the folder by right clicking on iPhoto (on a Mac hit command then click) and select “View Package Contents”. 
Step 2: Scroll down in the “Package Contents” folder until you see the “Masters” folder. Select “Masters”. This is where all the images in your library are located.

Step 3: Open the “Masters” file. You should see folders labeled with numbers. To transition them easily, do this folder by folder. It will be easier to sort through your pictures and can weed out the ones you don’t want anymore. Import time into Lightroom will also be much shorter.

Step 4: Copy and save the folder in a main folder. If you have an external hard drive I would suggest that to save space on your computer. Keep in mind: you are making copies of what is already on your computer.

Step 5: Title your main folder “Lightroom Photos”, “Lightroom Imports” or something along these lines. Copy the folder you are importing there.

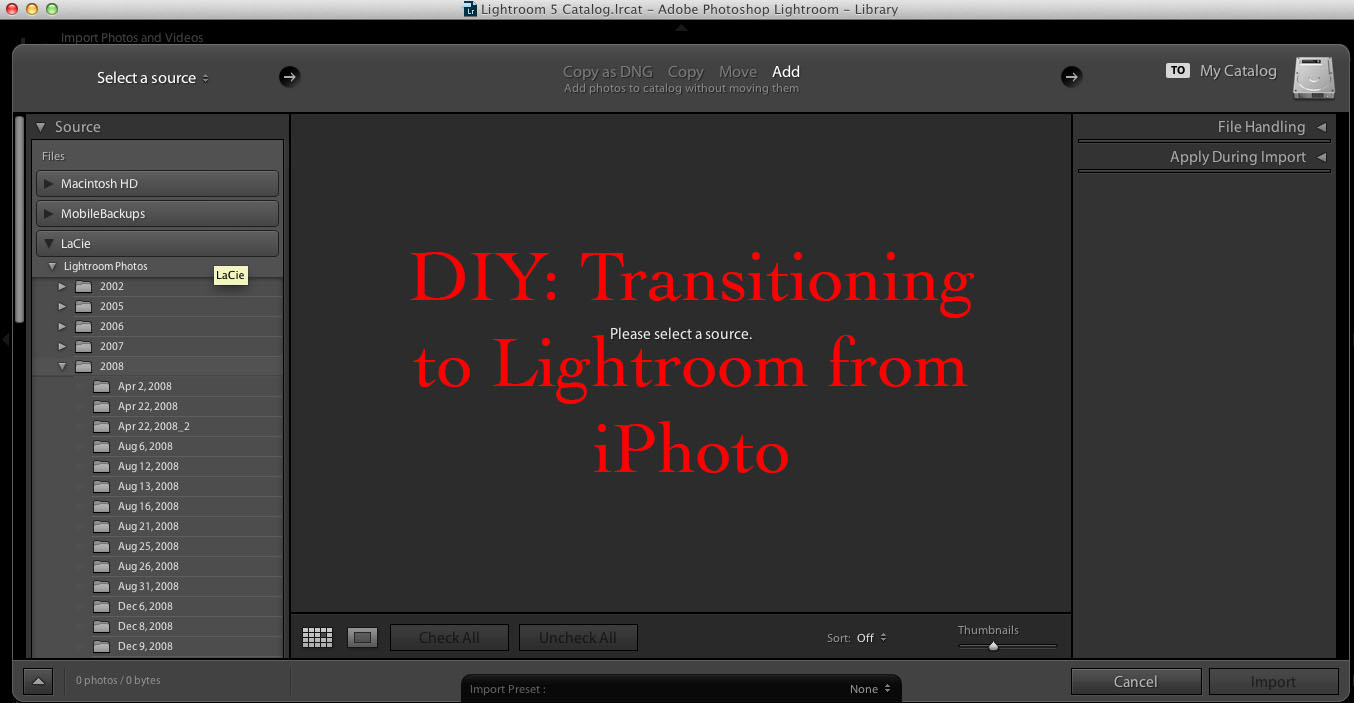
Step 6: Open Lightroom.

Step 7: Click the “Import” button. You will be asked to select a folder from which to import. Find the folder with the copies and select that.

Step 8: Choose the images you want. Now would be the time to delete unwanted photos. Check the images you are going to import and click “Import Now”. They will be moved into your “Recent Imports” catalog in Lightroom.

Step 9: Create a collection. A collection in Lightroom is equivalent to a event or folder in iPhoto. Move your recently imported photos into an appropriate collection before moving on to the next file you will import. It will make your entire library more organized and easier to sort through after you have imported all of them.

To do this for your entire library repeat these nine steps for the individual folders in the “masters” folder. I hope this was helpful! I know I already love using Lightroom to edit photos and their watermarking feature is awesome.
Find me at:

3 Comments
I’ll have to check that out! I’m using iPhoto now.
I actually had no idea of all of the things iPhoto has to offer even after using it for so long. I mainly just use it as storage space so I can take pictures off of my phone to free up space on there. Thanks for sharing these tips!
Keep up tutorials! Blogging related are always going to be helpful!